OK BOOMER 3D Workflow, it works - 2023 EDITION
by piro
Old version can be found here: OK BOOMER, HOW IT WORKS
This is an update to my previous workflow describing article, with few updates to tools/plugins I use. It is still very 3ds max centric, but some procedures can be applied to Maya or Blender along the way.
First, software and plugins I mostly use for authoring models (not everything obviously, but major players that are installed on every computer I ever worked on):
Pureref - Pureref download page
3ds Max (2023 for now) - Whats new - Autodesk Max 2023
Marmoset Toolbag 3 - Marmoset Toolbag Website - (4 will do as long it allows baking meshes)
Substance Painter - Substance Painter Steam version with lifetime licence
Textools - Textools for 3ds max
InsetFix Modifier - InsetFix maxscript download - greatly helps with sub-d workflow.
UVPacker - UVPacker for max - you don't really need paid version.
In this post I'll focus on modelling only, and continue with baking / texturing techniques in later posts.
Biggest change from my workflow post from years ago is that I've got rid of UVLayout, as UVPacker allows same if not better packing results, and incorporating InsetFix permanently to by workflow.
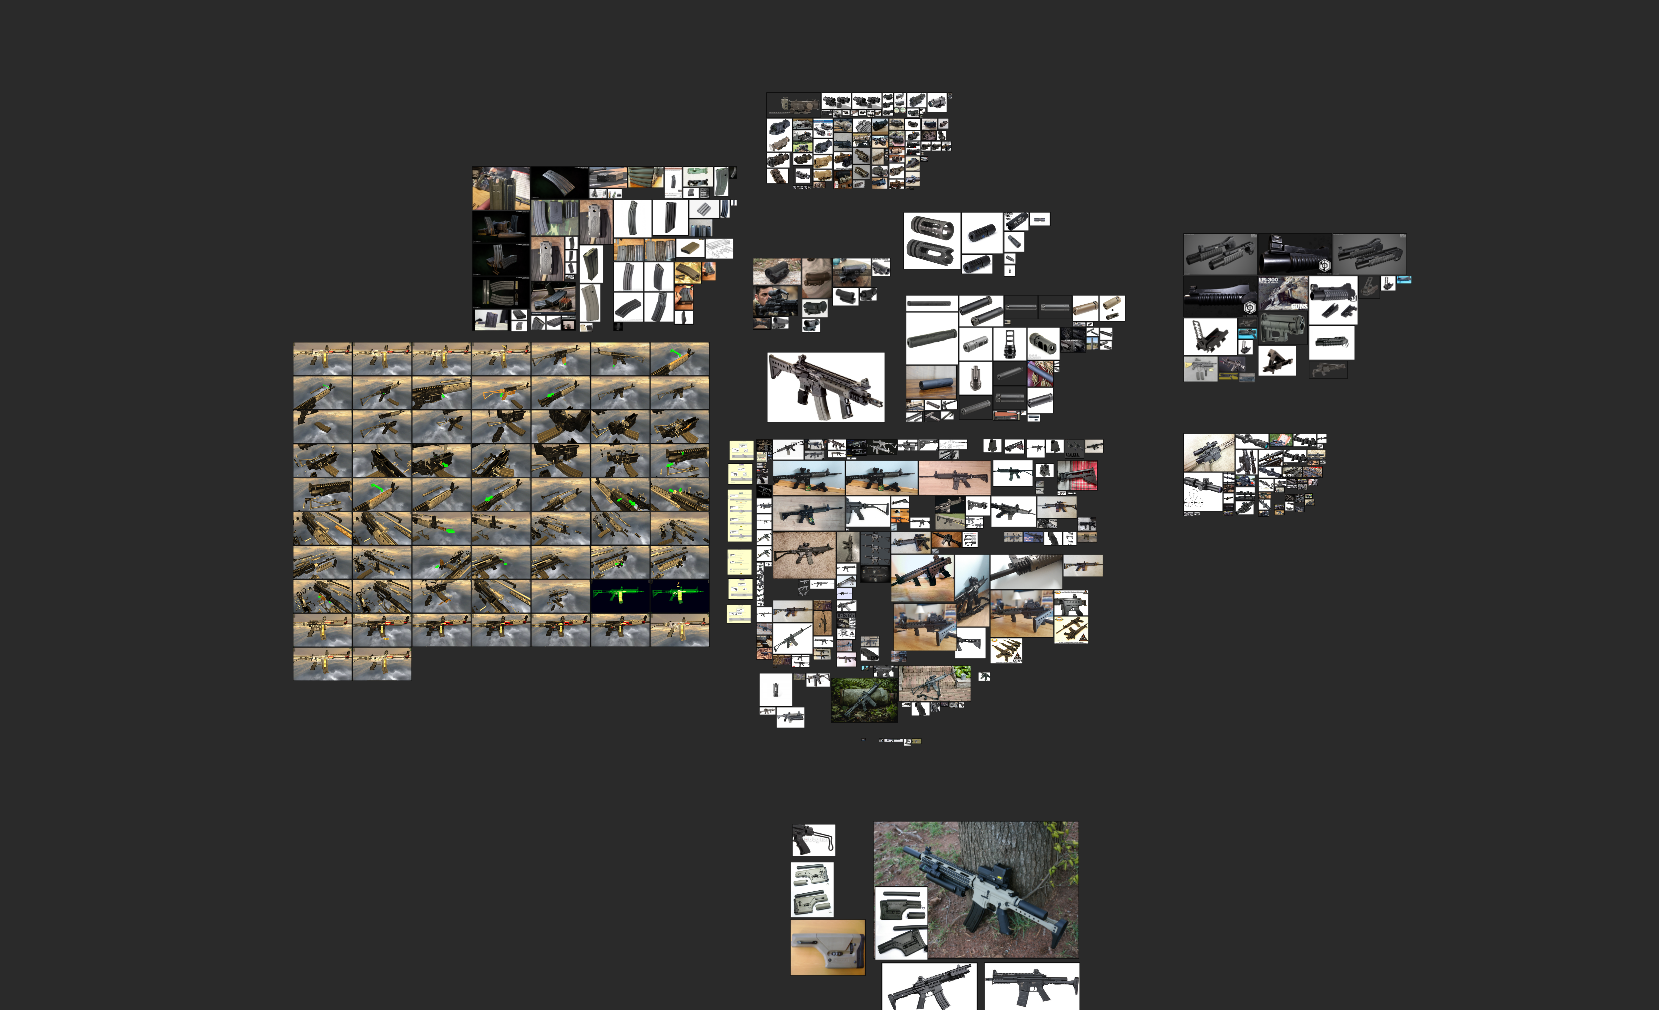
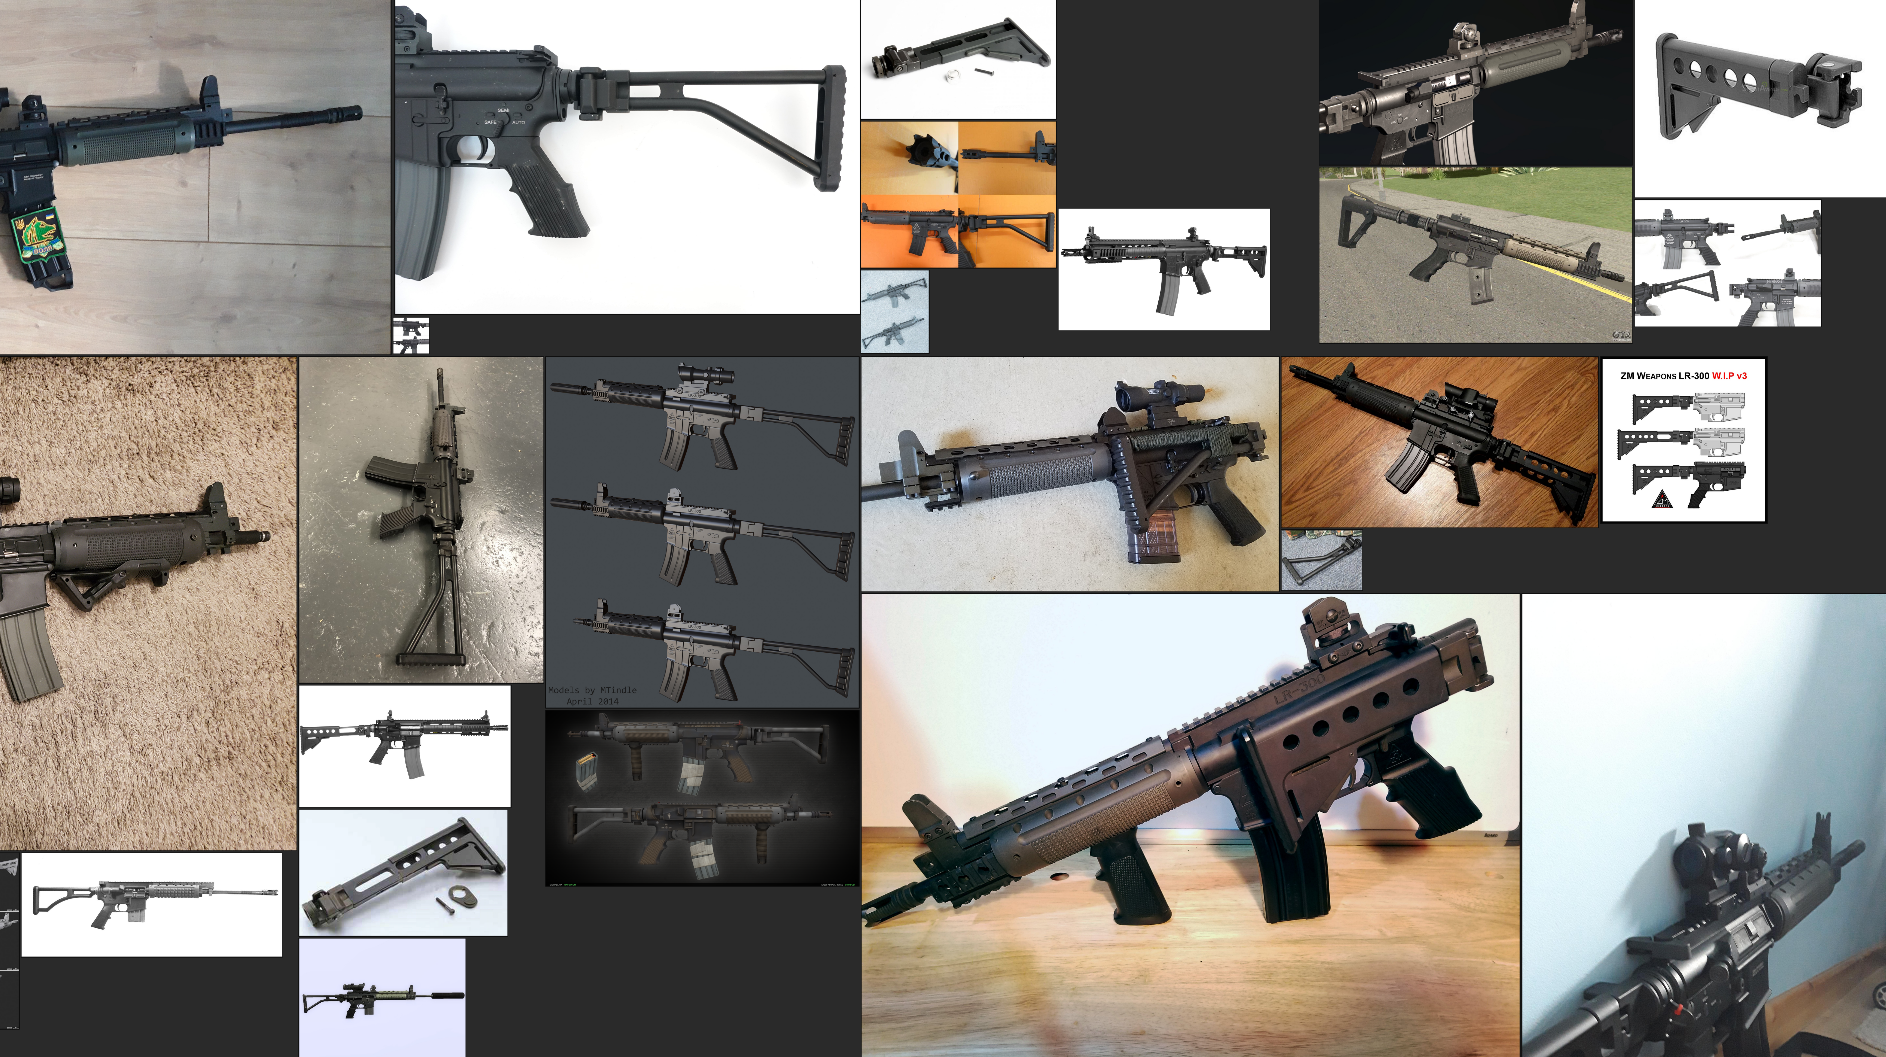
First step, even before opening 3DS max, Is to gather references - depending on thing you want to model, simple google image search can be enough for the job, sometimes its good to own some books about certain topic or visit museum with a camera. Or buy the gun you want to model, but that's extreme.
Favorite software to group references for me is Pureref, as it allows for automatic and manual grouping of images, and show them in one window in form of a big gallery of everything, with intuitive zooming and panning, This is how pureref looked like for my LR300 (check the model itself here: Artstation page ) project:
My lowpoly models are still created 100% in 3DS Max, unless I really want to use Cad (moi3d / fusion360, but thats more for concepting/designing things rather than pure modelling). After gathering references, I start blockout phase, sometimes used interchangeable with "basemesh" - depending how much time there is, and if I forget its blockout and start putting details too soon, but still not paying attention to clean topology - this is mostly to get proportions and shapes right. I still try to keep most of polygons as quads if possible, as it'll help me optimise/retopologise later.
With blockout done, I do proper basemesh based on it - It has defined all the details I'd like to see on LP (Lowpoly) geometry, and proportions that match the references, and after finishing it, duplicate it, hide source, and start working on HP (Highpoly). Personally I prefer sub-d modelling exclusively, currently popular workflows like to include zbrush/dynamesh/proboolean workflow, it's ok when the time is tight and you need to quickly have some results. However, it teaches practically nothing about controlling topology and flow of the geometry, so a good practice is to use sub-d whenever you can, and only half-ass meshes in zbrush when you're in a big hurry and client don't care.
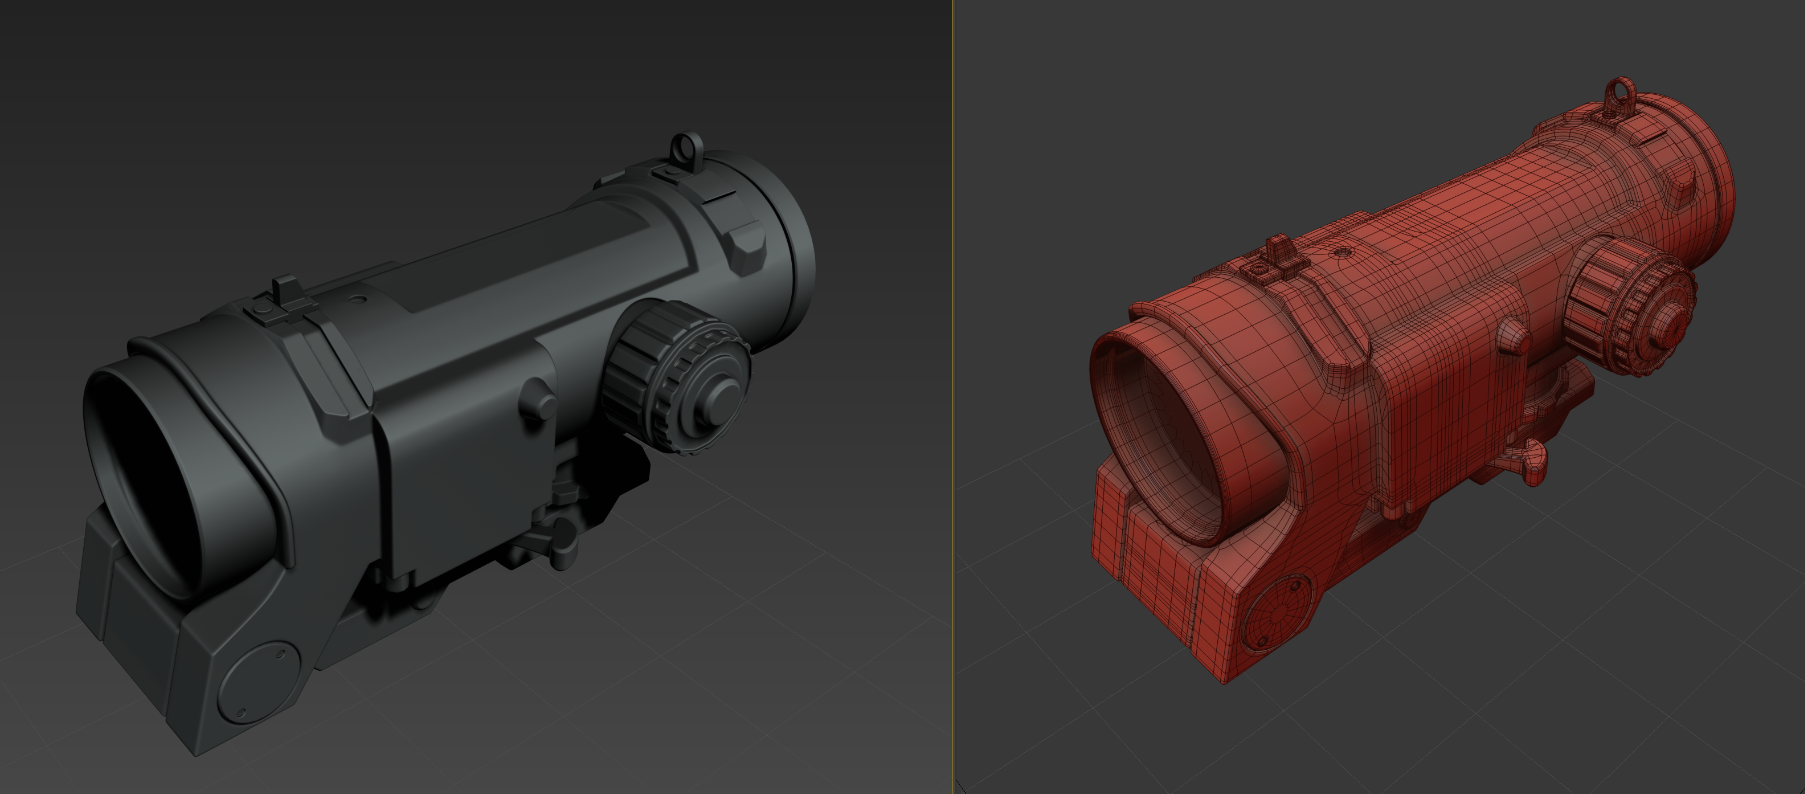
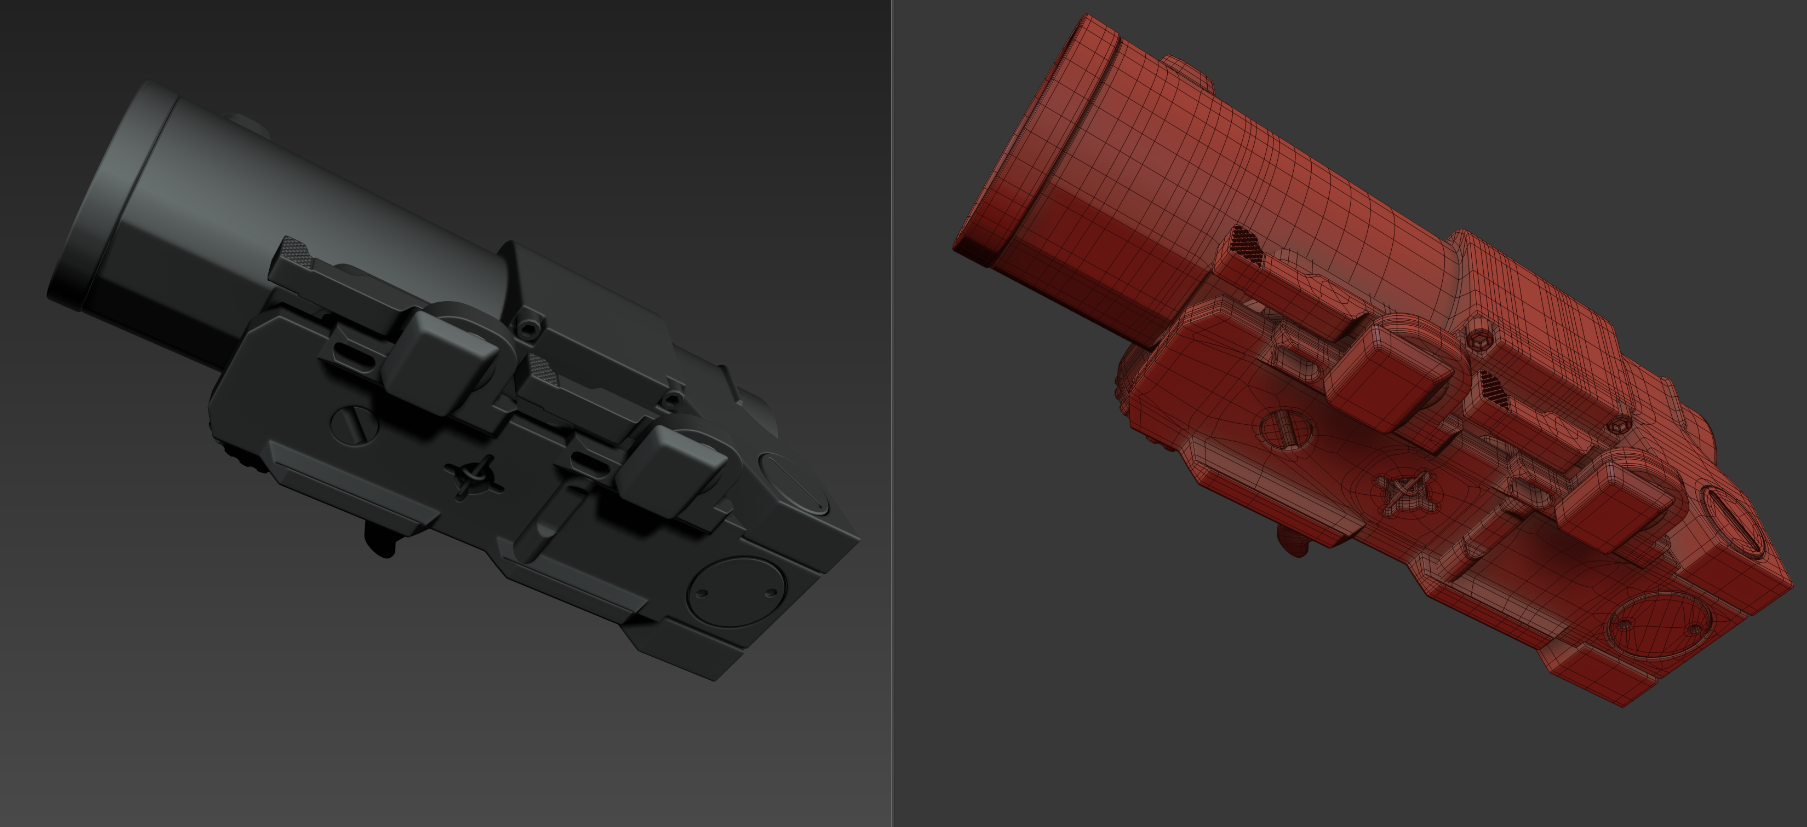
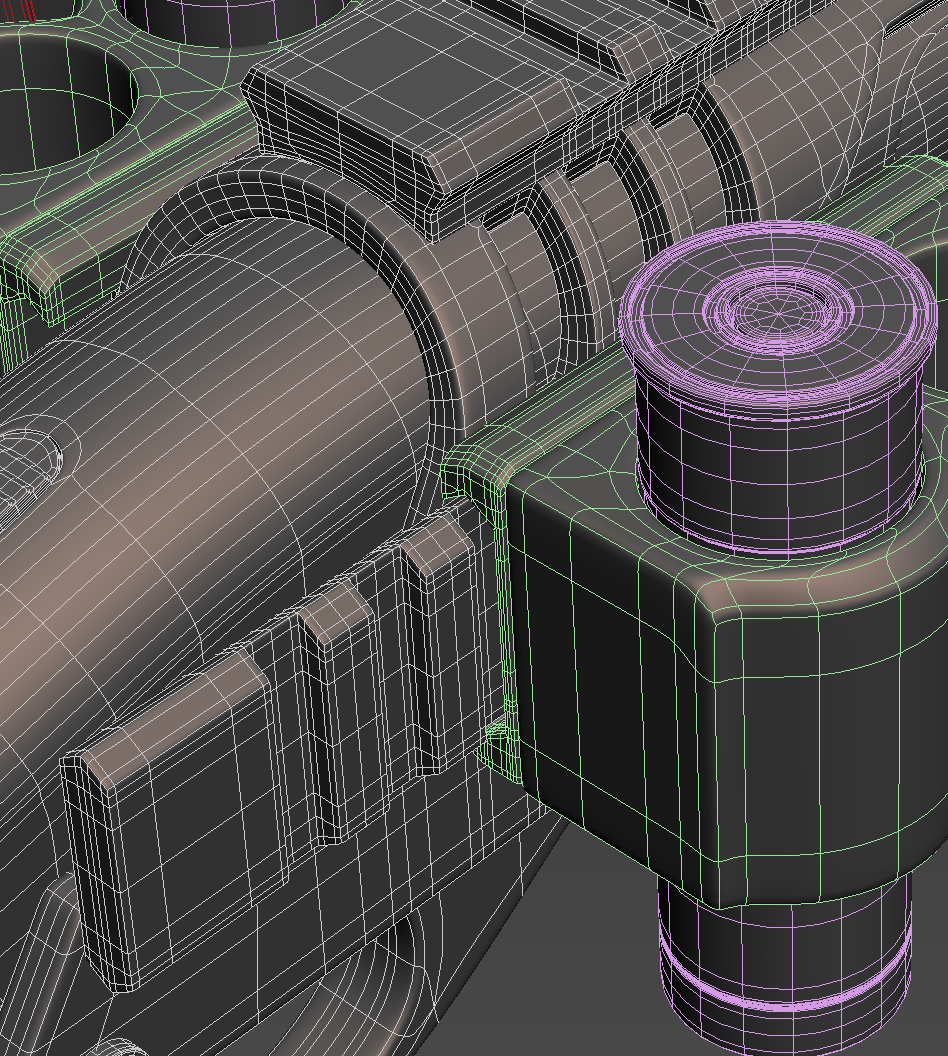
Now that half of the people got offended and stopped reading, the HP I end up with have all the details on geometry, with the exceptions like diamond patterns on grips or fabric weave that can be easily made on texture itself. I do model sometimes braided cables / more complex diamond patterns when the surface they're on is curved, but its usually pain.
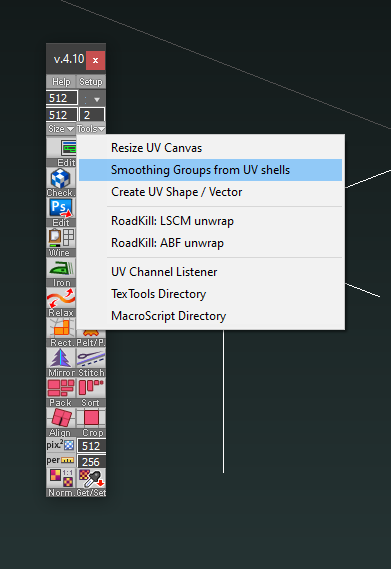
With HP done, I go back to my basemesh, that now should overlap with the finished high poly pretty tight. Duplicating it, this will be my low-poly mesh. Im deleting uneccessary edges / division, making the basemesh truly lowpoly, yet detailed enough to bake properly (rules for certain types of objects still apply - where to put denser geo, what chamfer and what not, depending on where the camera looks, et cetera). Now the magical part that streamlines unwrapping by 80% of time. I set up automatic smoothgroups by 33-45 degrees, having most if not all hard edges well defined on low poly, Then I apply unwrap UVW modifier, and use one nifty function - UV chunks by smoothgroups, that creates UV islands based off your smoothgroups. Only thing you need to manually cut are cylinders, that need to be cut on one edge to unwrap properly. After all the pieces are done, I use quick peel, relax, and have quite good, relaxed UVs.
Now, with your model unwrapped, time to make neccessary tweaks to UV proportions before packing:
1. Adjusting UV scale according to how close parts of mesh are to player - If its a gun, then you want iron sights and receiver to have more texels (more uv space /pixels ) than for example interior of barrel.
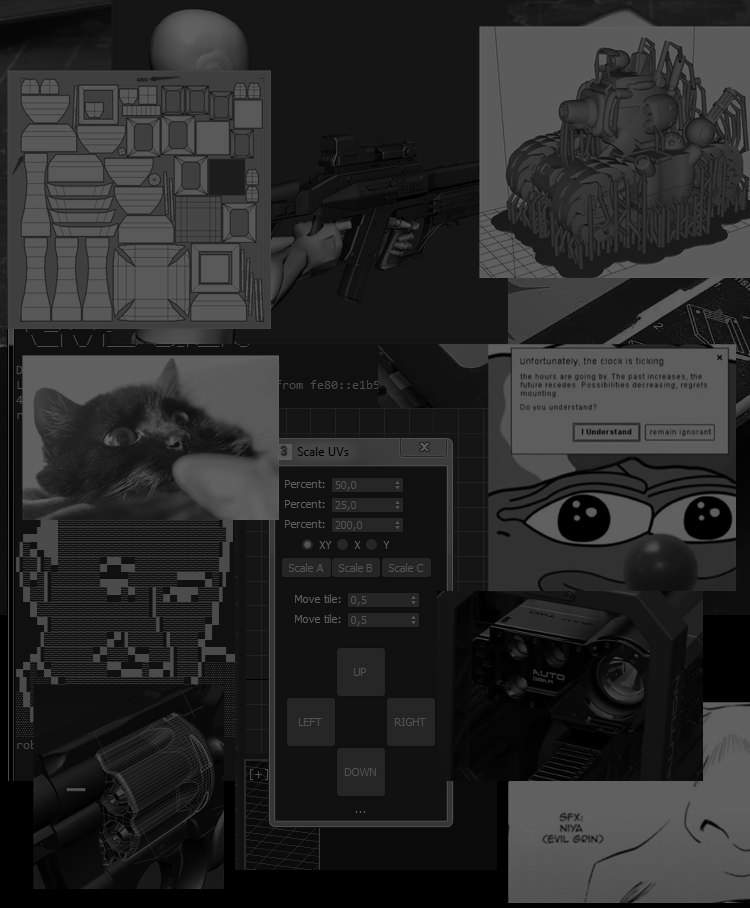
2. Scaling up smaller elements like bolts/nuts/pins/buttons/labels that will have text on it, so they don't get super-blurry (You can use my script for quick scaling along U/V axes)
3. Rotating most elements in one direction, even if you texture in substance painter, its still good to maintain some edgeflow with uv space, just for texturing sake. Textools "Sort" helps a lot doing that, otherwise use checker with directions marked on top of it in some way.
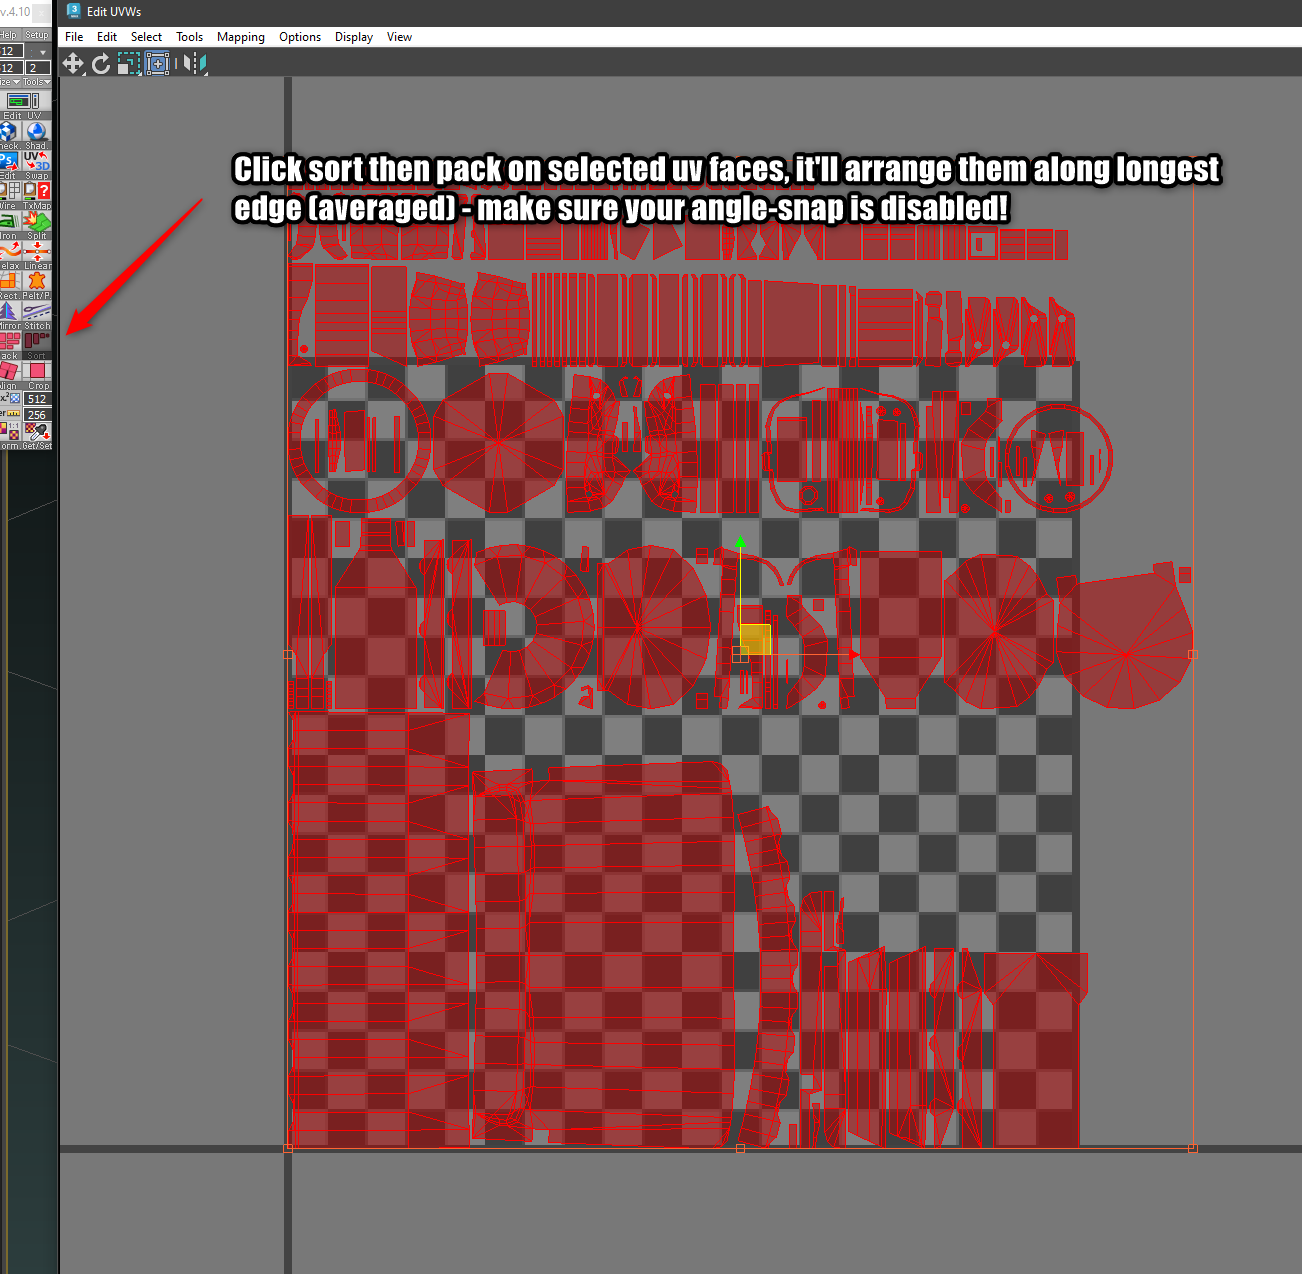
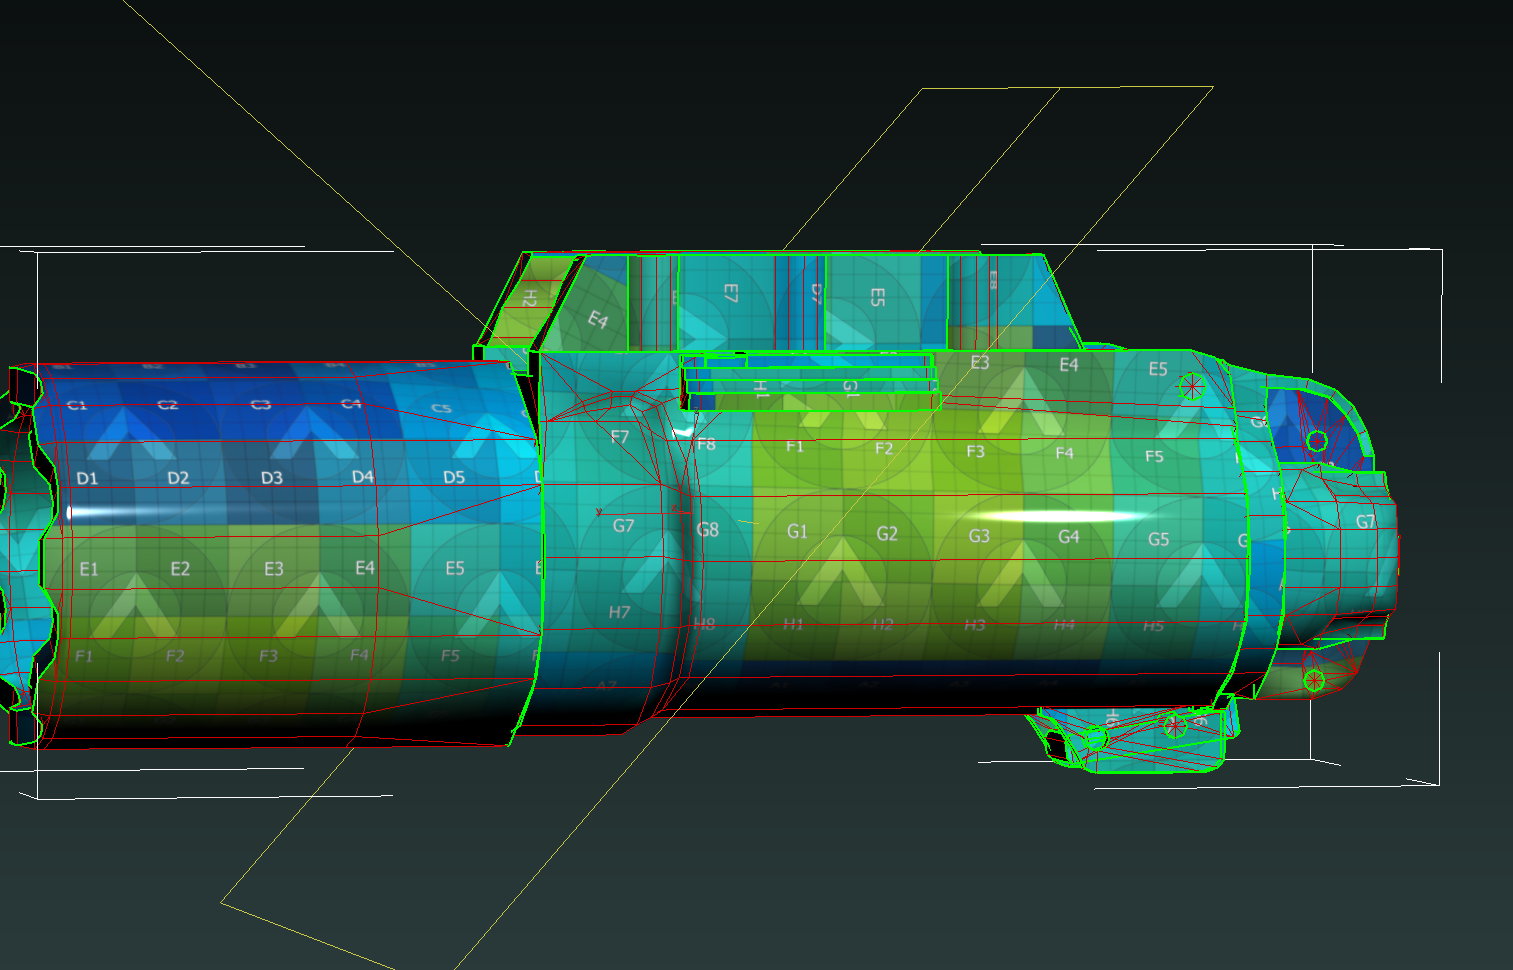
Now, with all parts aligned and scaled the way you want, apply UVPacker modifier on top of your mesh, and set it like that, so it doesnt try to rotate your aligned UV chunks:

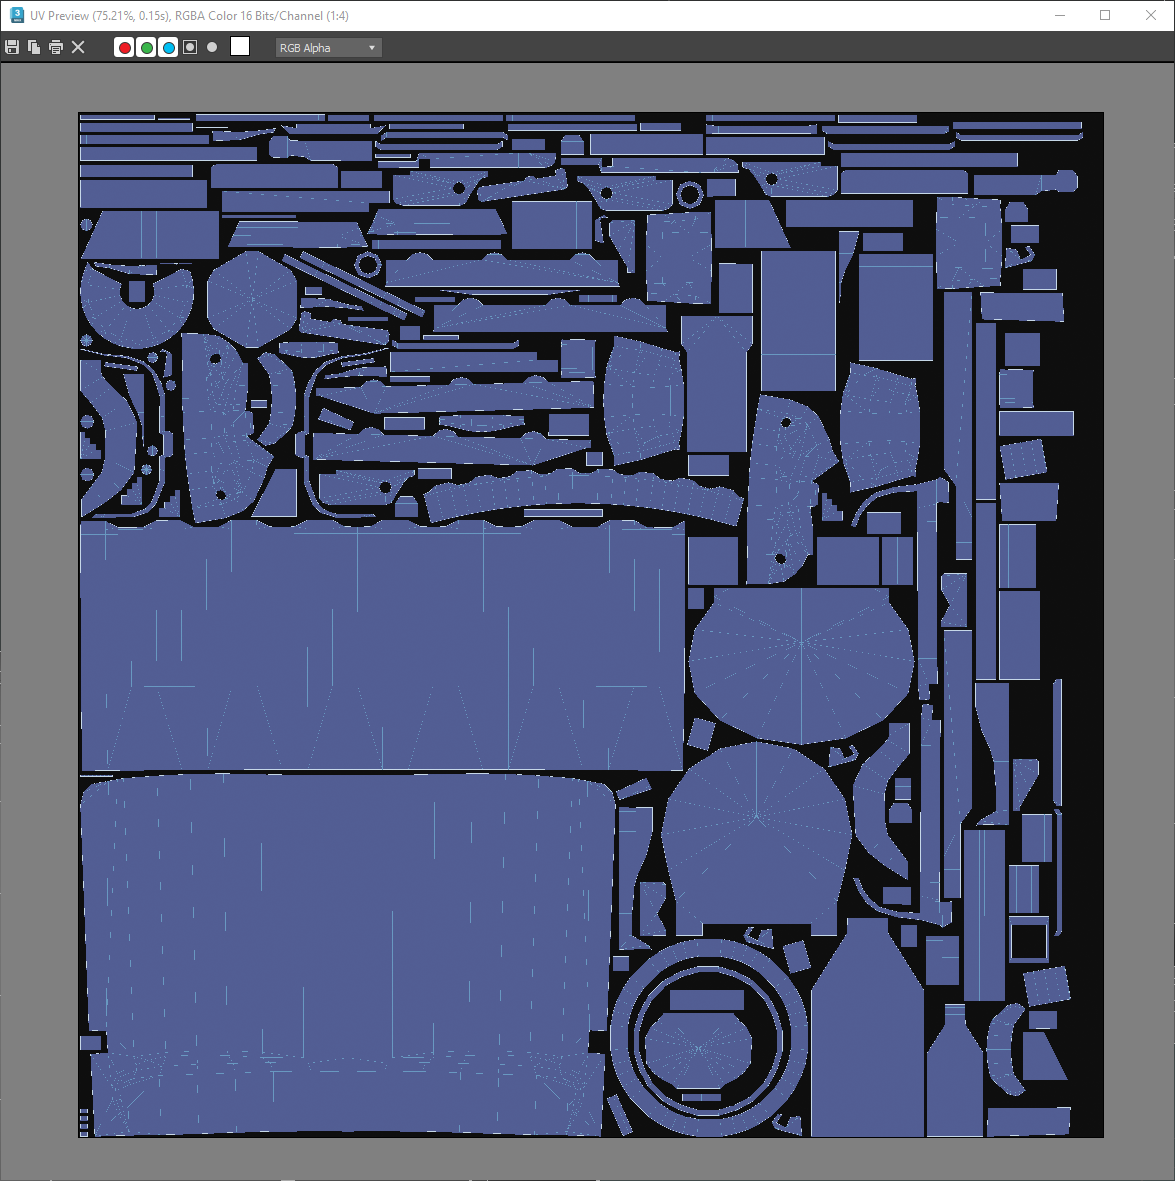
After packing, you'll get niftly packed UV map, similar to this:
All whats left is to make sure our smoothgroups and uv chunks are syncronised, run this:
And your model is ready to be exported for baking.
Look out for post about bakes, in the meantime, check the general baking quide and troubleshooting here:
Getting best normalmap bakes