OK BOOMER 3D Workflow, it works.
by piro
Several people asked me about my workflow, so I've decided to put it here for easy of access. This is translation of one of 2010-something post i've made on max3d.pl, with additions to workflow with techniques / tools that are more recent.
My current modelling workflow include softwares:
pureref - working with references
3ds max - base /lp/hp modelling - get textools maxscript for it and install.
uv layout - tight unwraps
marmoset - baking
You can make most of these things just in 3ds max like I did in the dinosaur times, and I'll write up when you can use alternatives, but this post will be focused on using above packages.
My lowpoly (LP from now on) models are created 100% in 3D studio max, version 2012 that I've bought licence for many sheckels, or 2017, that one of my favorite clients generously bought for me. Most of my custom tools that help me speed up my workflow are in 2012 though, and i dont use any particular features that are NOT in 2012 that'd force me to use newer version. Why I'm not upgrading? Because subscription model, at least by the time of writing this post, is quite expensive, and after 3 years I'd spent same money I've spent on 2012, and its almost 2020, so I'd lose triple amount of money. Anyway.
Assuming you have all the refs you need and few more, start modelling:
Blockout phase, LP phase are done in 3DS Max. Blockout phase, sometimes called "basemesh" phase when it's quite dense, but doesnt have clean topology, I'm trying to keep it in quads anyway for easier of work later. Looptool/Swift loop is your friend, when you'll be making edges around the borders to protect them when you sub-d later.
Having a basemesh that have well defined details that I'd see on LP geometry, and have a proportions that match the references / desired model, I'm making a copy of it and start working on high poly (HP from now). I use sub-d modelling exclusively, nowadays workflows like to include zbrush/dynamesh/proboolean workflow, its ok when the time is tight and you need to quickly have some results. However, it teaches practically nothing about controlling topology and flow of the geometry, so a good practice is to use sub-d whenever you can, and only half-ass meshes in zbrush when youre in a hurry and client dont care.
Ok, now that half of the people got offended and stopped reading, the HP I end up with have all the details on geometry, with the exceptions like diamond patterns on grips or fabric weave that can be easily made on texture itself. I do model sometimes braided cables / more complex diamond patterns when the surface they're on is curved, but its usually pain.
With HP done, I go back to my basemesh, that now should overlap with the finished high poly pretty tight. Duplicating it, this will be my low-poly mesh. Im deleting uneccessary edges / division, making the basemesh truly lowpoly, yet detailed enough to bake properly (rules for certain types of objects still apply - where to put denser geo, what chamfer and what not, depending on where the camera looks, et cetera). Now the magical part that streamlines unwrapping by 80% of time. I set up automatic smoothgroups by 33-45degrees, having most if not all hard edges well defined on low poly, The i apply unwrap UVW modifier, and use one nifty function - uv chunks by smoothgroups, that creates uv islands based off your smoothgroups. Only thing you need to manually cut are cylinders, that need to be cut on one edge to unwrap properly. After all the pieces are done, I use quick peel, relax, and have quite good, relaxed UVs.
The poor mans UV version, using 3ds max:
Ok, now you'll need some automation, unless you want/need to do tis by hand. Get a copy of textools, and on previously prepared uv pieces run "Sort" (to get all the UV pieces alignes to one of axes, this is important step) and then "Pack" or whatever it is called. Remember to:
- turn off any snapping in 3ds max, or you'll end up with weirdly rotated pieces instead of nicely arranged, vertically/horisontally oriented UVs
- have some padding options, you dont want to have zero-pixel distances between the uv islands, it'll cause bleeding and baking issues later.
This is less efficient way and gives a rather random result, but if you'll be using painter to texture it, it doesnt matter that much how logically arranged the UVs are, as you';; be using viewport to texture it anyway.
Normal UV version, using UV layout:
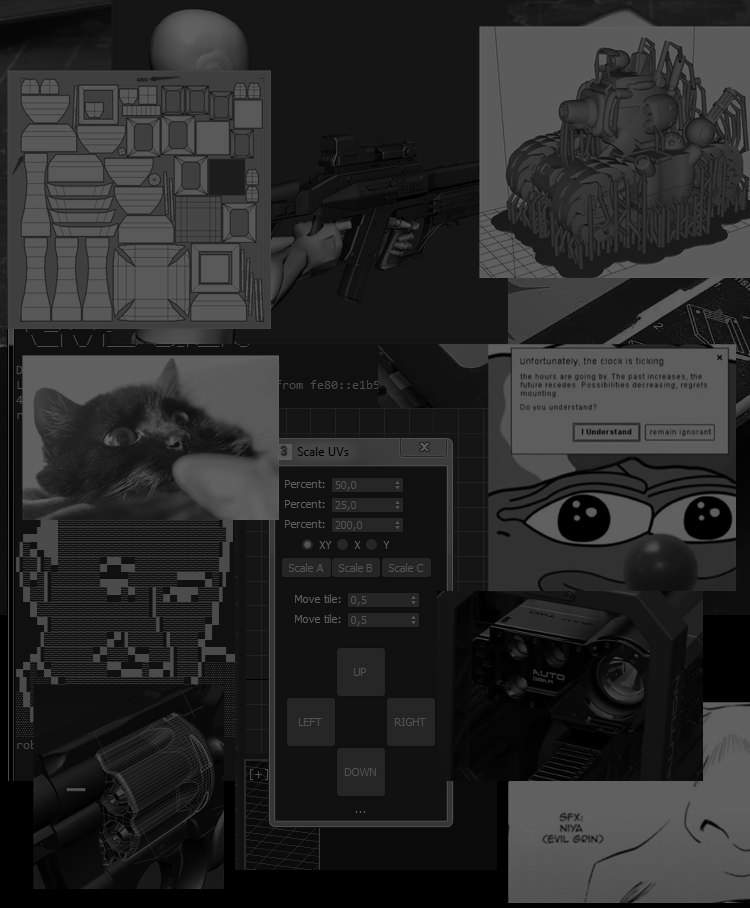
I scale UVs in max, depending on their importance (back/bottom faces are smaller, sights are larger, etc). Such prepared model is going to UV layout (strongly advice getting the "UV layour bridge" script for super-fast work between max and UV layout)
In uv layout, I make few boxes around parts of certain areas, not beign very precise about it - usually for weapon I like having sights and magazine / ammo somewhere in one part of the texture, rest is scattered around 0-1 UV space.
Then, UV layout settings:
After aligning the pieces to one of the axes:
4k map,quality: best, bleed (padding) 12PX, 10-12MINS, no rotation, show shell bleeds, show tile coverage (very usefull for dick comparing later that you've utilised the UV better than rest of the people), Allow box overlaps, shrink boxes to fit. Rest by default, usually 1 or off.
Click pack, go make a coffe, return 10 minutes later, and enjoy having model packed more tightly than you'd ever managed to pack by hand. Or click again and test results, its up to you. For more complex morels, 15 minutes of UV layout work could save me up to 10hours of packing.
After everything, click "send" if you're using UV bridge, or save the mapped obj and get it back to max.
When you have the model back in max, run on it a textool function "Smoothing groups from UV chunks" - this is to endure that my smoothgroups are still synced with uv islands. Now, into the baking.
The poor mans baking version, using 3ds max:
Note that you wont be getting all the nice maps that substance painter uses, thats the main reason i've started using marmoset baker.
Contrary to popular belief, you can get good normalmaps from 3ds max, it just require some more knowledge and work, that most people dont have or want to pursue. Anyway:
On your lowpoly model, apply "Turn to poly" modifier, and limit the edges to 3. This will make your model triangulated, without making any permanent modifications to it. Some edges might be incorrectly placed after that, fix it on edit_poly modifier using "turn" option for faces edges.
Apply Projection modifier on top of it, add your HP meshes, reset cage to average all verticles of it, and offset it. Spend some time manually tweaking it (shouldnt take more than 5 minutes) next step.
Render to texture dialog, an old friend for old people. Bake normalmaps there with double the final resolution, to fight crappy filtering (if you start playing with filtering/aa options in render settings, it'll render longer than just double size, so do yourself a favor and save time). You should be able to bake normalmap, AO and colormap ID. Cavity map can be extracted from normalmap in photoshop using xnormal plugin. Note that sometimes you'll need to explode the model to avoig crappy overlaps from misshits of rays. Textools might help you get some additional maps.
Normal baking version, using marmoset toolbag.
Very streamlined: click on bread icon, become breadmaster.
Export your hp model with some iterations on sub-d (2 is usually enough, 3 if you started with super-lowpoly mesh for sub-d) - this is good moment to apply some colors to HP parts, that will be baked into material ID map, export your lp model.
Put highpoly meshes into HIGH group, lowpoly mesh to LOW group, Name the baked maps, tweak skew, tweak offset, select maps you need (for painter you'd want everything, especially thisckness / cavity that you wont get from max.
Bake it at 2x desired resolution, shrink them afterward using some sharp interpolation alghoritm.
And thats it, you have baked mesh. Most of things mentioned here are pretty straightforward, but people still ask about certain steps of creating models, so.
My current modelling workflow include softwares:
pureref - working with references
3ds max - base /lp/hp modelling - get textools maxscript for it and install.
uv layout - tight unwraps
marmoset - baking
You can make most of these things just in 3ds max like I did in the dinosaur times, and I'll write up when you can use alternatives, but this post will be focused on using above packages.
My lowpoly (LP from now on) models are created 100% in 3D studio max, version 2012 that I've bought licence for many sheckels, or 2017, that one of my favorite clients generously bought for me. Most of my custom tools that help me speed up my workflow are in 2012 though, and i dont use any particular features that are NOT in 2012 that'd force me to use newer version. Why I'm not upgrading? Because subscription model, at least by the time of writing this post, is quite expensive, and after 3 years I'd spent same money I've spent on 2012, and its almost 2020, so I'd lose triple amount of money. Anyway.
Assuming you have all the refs you need and few more, start modelling:
Blockout phase, LP phase are done in 3DS Max. Blockout phase, sometimes called "basemesh" phase when it's quite dense, but doesnt have clean topology, I'm trying to keep it in quads anyway for easier of work later. Looptool/Swift loop is your friend, when you'll be making edges around the borders to protect them when you sub-d later.
Having a basemesh that have well defined details that I'd see on LP geometry, and have a proportions that match the references / desired model, I'm making a copy of it and start working on high poly (HP from now). I use sub-d modelling exclusively, nowadays workflows like to include zbrush/dynamesh/proboolean workflow, its ok when the time is tight and you need to quickly have some results. However, it teaches practically nothing about controlling topology and flow of the geometry, so a good practice is to use sub-d whenever you can, and only half-ass meshes in zbrush when youre in a hurry and client dont care.
Ok, now that half of the people got offended and stopped reading, the HP I end up with have all the details on geometry, with the exceptions like diamond patterns on grips or fabric weave that can be easily made on texture itself. I do model sometimes braided cables / more complex diamond patterns when the surface they're on is curved, but its usually pain.
With HP done, I go back to my basemesh, that now should overlap with the finished high poly pretty tight. Duplicating it, this will be my low-poly mesh. Im deleting uneccessary edges / division, making the basemesh truly lowpoly, yet detailed enough to bake properly (rules for certain types of objects still apply - where to put denser geo, what chamfer and what not, depending on where the camera looks, et cetera). Now the magical part that streamlines unwrapping by 80% of time. I set up automatic smoothgroups by 33-45degrees, having most if not all hard edges well defined on low poly, The i apply unwrap UVW modifier, and use one nifty function - uv chunks by smoothgroups, that creates uv islands based off your smoothgroups. Only thing you need to manually cut are cylinders, that need to be cut on one edge to unwrap properly. After all the pieces are done, I use quick peel, relax, and have quite good, relaxed UVs.
The poor mans UV version, using 3ds max:
Ok, now you'll need some automation, unless you want/need to do tis by hand. Get a copy of textools, and on previously prepared uv pieces run "Sort" (to get all the UV pieces alignes to one of axes, this is important step) and then "Pack" or whatever it is called. Remember to:
- turn off any snapping in 3ds max, or you'll end up with weirdly rotated pieces instead of nicely arranged, vertically/horisontally oriented UVs
- have some padding options, you dont want to have zero-pixel distances between the uv islands, it'll cause bleeding and baking issues later.
This is less efficient way and gives a rather random result, but if you'll be using painter to texture it, it doesnt matter that much how logically arranged the UVs are, as you';; be using viewport to texture it anyway.
Normal UV version, using UV layout:
I scale UVs in max, depending on their importance (back/bottom faces are smaller, sights are larger, etc). Such prepared model is going to UV layout (strongly advice getting the "UV layour bridge" script for super-fast work between max and UV layout)
In uv layout, I make few boxes around parts of certain areas, not beign very precise about it - usually for weapon I like having sights and magazine / ammo somewhere in one part of the texture, rest is scattered around 0-1 UV space.
Then, UV layout settings:
After aligning the pieces to one of the axes:
4k map,quality: best, bleed (padding) 12PX, 10-12MINS, no rotation, show shell bleeds, show tile coverage (very usefull for dick comparing later that you've utilised the UV better than rest of the people), Allow box overlaps, shrink boxes to fit. Rest by default, usually 1 or off.
Click pack, go make a coffe, return 10 minutes later, and enjoy having model packed more tightly than you'd ever managed to pack by hand. Or click again and test results, its up to you. For more complex morels, 15 minutes of UV layout work could save me up to 10hours of packing.
After everything, click "send" if you're using UV bridge, or save the mapped obj and get it back to max.
When you have the model back in max, run on it a textool function "Smoothing groups from UV chunks" - this is to endure that my smoothgroups are still synced with uv islands. Now, into the baking.
The poor mans baking version, using 3ds max:
Note that you wont be getting all the nice maps that substance painter uses, thats the main reason i've started using marmoset baker.
Contrary to popular belief, you can get good normalmaps from 3ds max, it just require some more knowledge and work, that most people dont have or want to pursue. Anyway:
On your lowpoly model, apply "Turn to poly" modifier, and limit the edges to 3. This will make your model triangulated, without making any permanent modifications to it. Some edges might be incorrectly placed after that, fix it on edit_poly modifier using "turn" option for faces edges.
Apply Projection modifier on top of it, add your HP meshes, reset cage to average all verticles of it, and offset it. Spend some time manually tweaking it (shouldnt take more than 5 minutes) next step.
Render to texture dialog, an old friend for old people. Bake normalmaps there with double the final resolution, to fight crappy filtering (if you start playing with filtering/aa options in render settings, it'll render longer than just double size, so do yourself a favor and save time). You should be able to bake normalmap, AO and colormap ID. Cavity map can be extracted from normalmap in photoshop using xnormal plugin. Note that sometimes you'll need to explode the model to avoig crappy overlaps from misshits of rays. Textools might help you get some additional maps.
Normal baking version, using marmoset toolbag.
Very streamlined: click on bread icon, become breadmaster.
Export your hp model with some iterations on sub-d (2 is usually enough, 3 if you started with super-lowpoly mesh for sub-d) - this is good moment to apply some colors to HP parts, that will be baked into material ID map, export your lp model.
Put highpoly meshes into HIGH group, lowpoly mesh to LOW group, Name the baked maps, tweak skew, tweak offset, select maps you need (for painter you'd want everything, especially thisckness / cavity that you wont get from max.
Bake it at 2x desired resolution, shrink them afterward using some sharp interpolation alghoritm.
And thats it, you have baked mesh. Most of things mentioned here are pretty straightforward, but people still ask about certain steps of creating models, so.